- Code XAML de design du contrôle
- Code c# du contrôle
<UserControl x:Class="SilverlightAmazon.Page"
    xmlns="http://schemas.microsoft.com/client/2007"
    xmlns:x="http://schemas.microsoft.com/winfx/2006/xaml"
    Width="640" Height="480">
    <Grid x:Name="LayoutRoot" Background="White">
        <Grid.RowDefinitions>
            <RowDefinition Height="1*"/>
            <RowDefinition Height="20*"/>
        </Grid.RowDefinitions>
        <StackPanel Grid.Row="0" Orientation="Horizontal">
            <TextBox x:Name="tx" Width="400"/>
	    <Button x:Name="search" Content="Search" Width="200" Click="search_Click"/>
        </StackPanel>
        <ListBox x:Name="listbox" HorizontalAlignment="Stretch"
        Margin="0,0,0,0" DisplayMemberPath="" VerticalAlignment="Stretch" Grid.Row="1"/>
    </Grid>
</UserControl>
using System;
using System.Collections.Generic;
using System.Linq;
using System.Windows;
using System.Windows.Controls;
using System.Windows.Documents;
using System.Windows.Input;
using System.Windows.Media;
using System.Windows.Media.Animation;
using System.Windows.Shapes;
using SilverlightAmazon.Amazon;

namespace SilverlightAmazon
{
    public partial class Page : UserControl
    {
        public Page()
        {
            InitializeComponent();
        }

        private void search_Click(object sender, RoutedEventArgs e)
        {
            AWSECommerceServicePortTypeClient client = new AWSECommerceServicePortTypeClient();
            ItemSearchRequest request = new ItemSearchRequest();

            request.SearchIndex = "Music";
            request.Keywords = tx.Text;
            request.ResponseGroup = new string[] { "Small", "Images" };
            request.Sort = "salesrank";

            ItemSearchRequest[] requests = new ItemSearchRequest[] { request };

            ItemSearch itemSearch = new ItemSearch();
            //A changer ;-)
            itemSearch.SubscriptionId = "--------------";
            itemSearch.AWSAccessKeyId = "--------------";
            itemSearch.Request = requests;
            client.ItemSearchAsync(itemSearch);
            client.ItemSearchCompleted += new EventHandler(client_ItemSearchCompleted);
        }

        void client_ItemSearchCompleted(object sender, ItemSearchCompletedEventArgs e)
        {
            listbox.ItemsSource = e.Result.Items[0].Item;
        }
    }
}
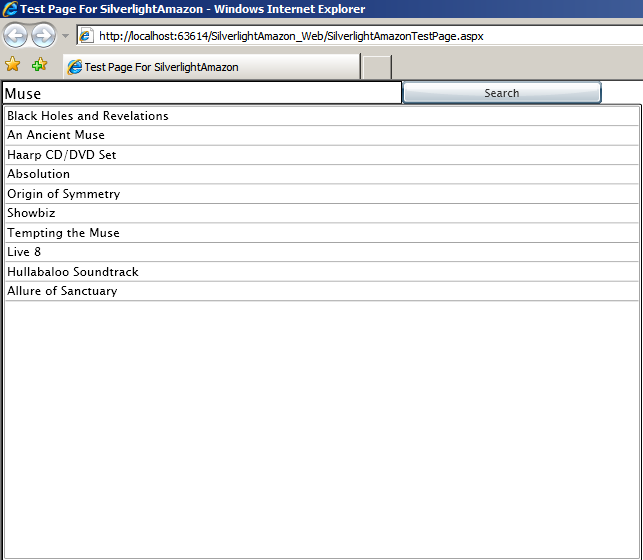
Voici le rendu après publication de ce code.
On ajoute le template pour transformer chaque listboxitem en grille. Ainsi, le principe est exactement le même que sous WPF...
<UserControl x:Class="SilverlightAmazon.Page"
    xmlns="http://schemas.microsoft.com/client/2007"
    xmlns:x="http://schemas.microsoft.com/winfx/2006/xaml"
    Width="640" Height="480">
    <Grid x:Name="LayoutRoot" Background="White">
        <Grid.RowDefinitions>
            <RowDefinition Height="1*"/>
            <RowDefinition Height="20*"/>
        </Grid.RowDefinitions>
        <StackPanel Grid.Row="0" Orientation="Horizontal">
            <TextBox x:Name="tx" Width="400"/>
	    <Button x:Name="search" Content="Search" Width="200" Click="search_Click"/>
        </StackPanel>
        <ListBox x:Name="listbox" HorizontalAlignment="Stretch"
           Margin="0,0,0,0" VerticalAlignment="Stretch" Grid.Row="1">
            <ListBox.ItemTemplate>
                <DataTemplate>
                    <Grid>
                        <Grid.ColumnDefinitions>
                            <ColumnDefinition Width="80"/>
                            <ColumnDefinition Width="400"/>
                        </Grid.ColumnDefinitions>
                        <Image Grid.Column="0" Source="{Binding SmallImage.URL}"/>
                        <TextBlock Grid.Column="1" Text="{Binding ItemAttributes.Title}"/>
                    </Grid>
                </DataTemplate>
            </ListBox.ItemTemplate>
        </ListBox>
    </Grid>
</UserControl>
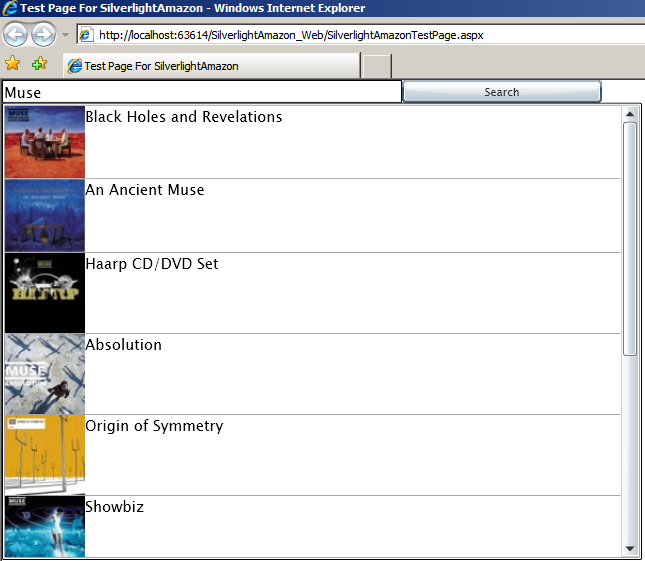
Voici après modification du template de la listboxItem ce qu'il est possible de voir ;-).
Il est donc à présent tout à fait possible de développer rapidement une application sous Silverlight 2. Pour continuer la recherche/exploration de ce post, voici quelques liens ... ;-)
L'exemple ci-dessus disponible en rar via ce lien.
L'exemple en démonstration.

une réaction
1 De Pierre-Emmanuel Dautreppe - 11/03/2008, 10:49
Très intéressant !
Là où je m'interroge maintenant, c'est que typiquement une appli de ce type pourrait être faite en ASP.NET "classique" avec une couche AJAX par dessus.
Par conséquent, dans quel cas allons-nous plutôt nous diriger vers une appli Silverlight plutôt qu'une appli ASP.NET / AJAX.
L'occasion d'un petit geek dinner pour aborder le sujet ?